DOWNLOAD The Auction Profit Blueprint
The 4 tools BIG organizations use every time to skyrocket auction profits!
The Step-By-Step Guide to stop leaving thousands on the table.
Learn how to photograph auction items to make them excite bidders. CharityAuctionsToday has tips to make every auction picture a success.
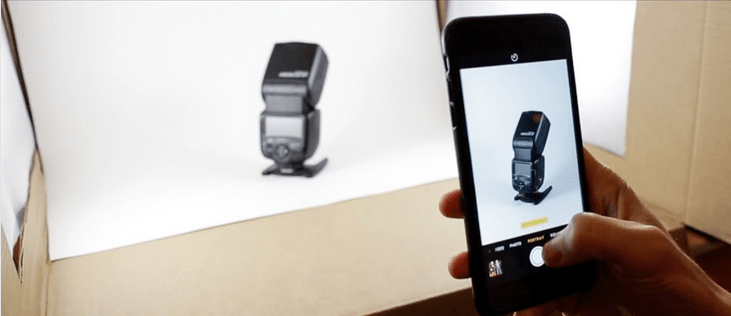
Knowing or learning how to photograph auction items are skills that will catapult your online charity auction to greater success. Bright, crisp, and clear photos are the heroes of your online charity auction. After all, in an online auction, the only clue a bidder has about the item is what they visualize from the photo. They do shop with their eyes! See how important it is to learn how to photograph auction items? It’s money in the bank.
Your organization is fortunate if it has a photographer on the auction committee, but if not, the following eight tips will get your designated photographer up to speed. All they need to learn how to photograph auction items well is to read the following tips and practice.
If you use quality auction item photos, you will increase your bids significantly and, more often than not, exceed your fundraising goals. If you use “just okay” or “they’ll do” photos, this will literally ruin your auction’s chance of meeting its fundraising goals.
It is true. We can’t express enough how your auction’s success is contingent upon quality auction item images.
Regardless of your photography skill level, take a look at the following eight auction photo tips. Each tip is valuable and will help get you to pro status without tearing your hair out. Learning how to photograph auction items is fun.
Auction item images are what bidders use to decide whether or not they will bid on an item. People really do shop with their eyes. This is why it’s critical to learn how to photograph auction items like a pro.
Need help with descriptions? Check out our examples of good item descriptions.

Today, most people have mastered their smartphone cameras, proven by this decade’s uptick in cloud storage sales for consumer photos. Smartphones and DSLR cameras are suitable for taking outstanding images of your auction items.
If you don’t have a DSLR camera but want to use one to shoot your auction items, you can rent one from a local camera shop. Consider making an “in-kind” trade for the camera rental by promoting them as one of your auction’s sponsors.
If there’s a photographer on your staff or someone’s spouse whose hobby is photography, you might ask them to take auction photos as their donation to the cause. Good photographers know how to photograph auction items, edit photos, understand lighting and backgrounds, and know when scale is an issue.
To be clear, taking photos of your niece’s birthday is drastically different from item or product photography. There are more technical considerations in product photography, such as lighting. To prove this point, browse eBay or Etsy. You’ll quickly identify photography to avoid and understand why visually appealing photography sells auction items. You’ll also see why lighting is critical. You’ll see outstanding photography, too. It’s worth the visit if you’re new at this.
Below is a good example of three vendors selling the same drill on a popular auction site. The one that’s grayed out has the highest price tag. The one with a white background will get the most interest, even if the grayed-out one costs less. Which one would you select?
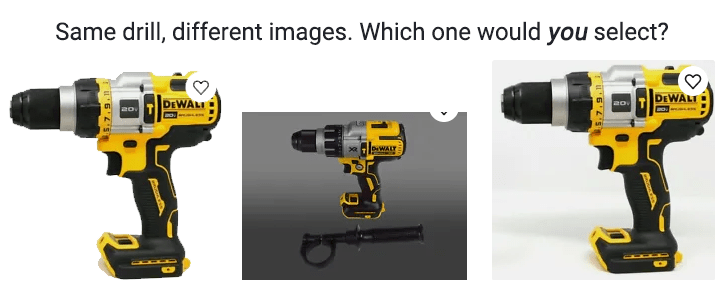
A poor auction photo turns off a potential buyer, as it affects what they think about the product’s quality or origin, and more than likely, they’ll steer clear of it. Sadly, in this example, the bad photo drill could very well be brand new, still in the box, but the bidder won’t go far enough with another click to read the item description.
The whole idea of taking polished, professional photos of auction items is that you do not have to explain them with words—the photo speaks for itself. But, of course, the product description is important, too. It’s just that a bidder can look at a great auction picture and think, “That’s exactly what I want.”
The reality of your online charity auction is that bidders want to buy an auction item or two to support your cause. That’s what we call buyer intent and is why good auction photography is critical.
If you plan to photograph auction items, make sure you do some testing before you start taking final pictures. Find out what kind of lighting works well with your items, what type of background works best, and where you should place your camera. Consider lighting, angles, and distance from the item you are photographing.
These basic tips for taking any auction photo with your smartphone are helpful as you perform testing:
Just for fun, try shooting a few items using a flash. You’ll learn that using a flash is not a good idea for item shots.
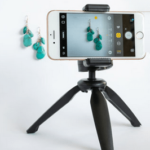 You’ll Want to Use a Tripod
 A tripod will help steady your camera when you’re shooting at different heights. You can buy one online at Amazon, starting at $11, ask your committee to borrow someone’s, or find an old one at a thrift store. It’s a worthy investment to eliminate the ill effects of the shakes.
White backgrounds work best for three reasons:
Something to consider when using a white background is that without using a light source such as a window, or actual lights, the background will appear gray, not white.
The auction item’s color pops because of the contrast with the white background. But understand, some items may not look the best in such high contrast of a white background. Turning to natural light is a good option when that happens.
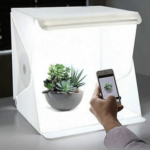
Lightbox
Lighting is your make-it-or-break-it tool. Good lighting is magic; bad lighting is not!
If you’ve ever taken a selfie, then you have an idea about lighting and shadows. With this hands-on experience, you probably understand that soft, natural light with even light distribution is ideal but not always possible.
Try artificial lighting with the help of umbrellas/reflectors or a DIY lightbox. In case you’re not feeling crafty enough for a DIY project, you can buy a table-top lightbox starting at $13 on Amazon.
Or you can try a sweep, which looks and feels like a white poster board that you can easily manipulate to bend, making a curved, seamless background. Sweeps are good for auction item photos where you want the item to “float” in a white void, which means there will be no visible table or wall. Jewelry works well in a sweep.
Sweeps are great because they are super inexpensive and you can make one at home in just minutes. A sweep will really help your learning curve on how to photograph auction items.
Or you can try the natural light method, called the window lighting technique, or daylighting, where direct or indirect lighting, you guessed it, from your home windows is used.
Don’t use a flash as your light source. It’s all kinds of wrong for product shots. You’ll know this if you tested your flash as recommended in step one.
If you’re photographing something with a lot of detail, try shooting from above and below and side by side. Detail or not, each item should have shots from several angles.
By photographing your product from several angles, don’t miss out on snapping pictures of details that might spark a bidder’s interest.
Be sure to load the main image into the photo carousel first, as it will be the one that appears in your online auction marketplace.
If you’re a Photoshop pro, then skip this section. If you’ve never heard of Photoshop, this section is for you.
Surely there is someone on your committee, in your friend group, or in your family who can edit photos in Photoshop or other editing software. Your organization might employ a designer, who would be the very best person to edit your charity auction images—you’ll only have to take the photos!
If you’re stuck and need a photo editor, there’s no time like the present to learn. Photo editing skills are handy to have. If you want to try it, there are plenty of free online tools to use that will help you edit your images. Our favorites are
Each tool is simplified, specifically to be easy for new users. Each provides step-by-step help and allows adjustments to color, brightness, contrast, size, resolution, and more.
If you find yourselves without an image editor, or you just don’t have the time to edit and upload them into CharityAuctionsToday’s platform, then, by all means, hire a photographer or editor. Great photos are that important to your online auction’s fundraising success. It will be money well spent—an investment, even! In fact, it is the most important role in auction fundraising success.
You will have all sizes of auction items to shoot. You must shoot each item so it doesn’t look distorted, such as too big or too small. Once you’ve mastered how to photograph auction items, getting this right will be a breeze.
Although not ideal, sometimes you can’t avoid adding an item to your photo composition that helps bidders understand the item’s scale. Let’s say you’re shooting an old-fashioned glass bubble gum dispenser. You might have to add a “scale” item such as a can of soda, a ball cap, or even a quarter in the photo’s composition.
Remember, if you shoot something and it appears too small, you’re going to lose detail. Or if you shoot it and it looks very large, it may be out of focus. Either way, you might lose a bidder. Isn’t it fun learning how to photograph auction items?
You’ve just learned how to photograph auction items. Keep these tips in mind as you shoot your auction items, and remember, if you’re stuck, reach out for help. Not to put any pressure on you, but quality auction item photography goes hand in hand with good auction item descriptions. These are what turns bidders into buyers.
All the best with your online charity auction and learning how to photograph auction items.
DOWNLOAD The Auction Profit Blueprint
The 4 tools BIG organizations use every time to skyrocket auction profits!
The Step-By-Step Guide to stop leaving thousands on the table.
